
How to make a travel-sized stick clip
As a follow-up to my Spring Safety Check post from last week, I wanted to share instructions on how I make the air-travel-ready stick clip (or clipstick) from an avalanche probe. Scroll down for a video.
What is a stick clip?
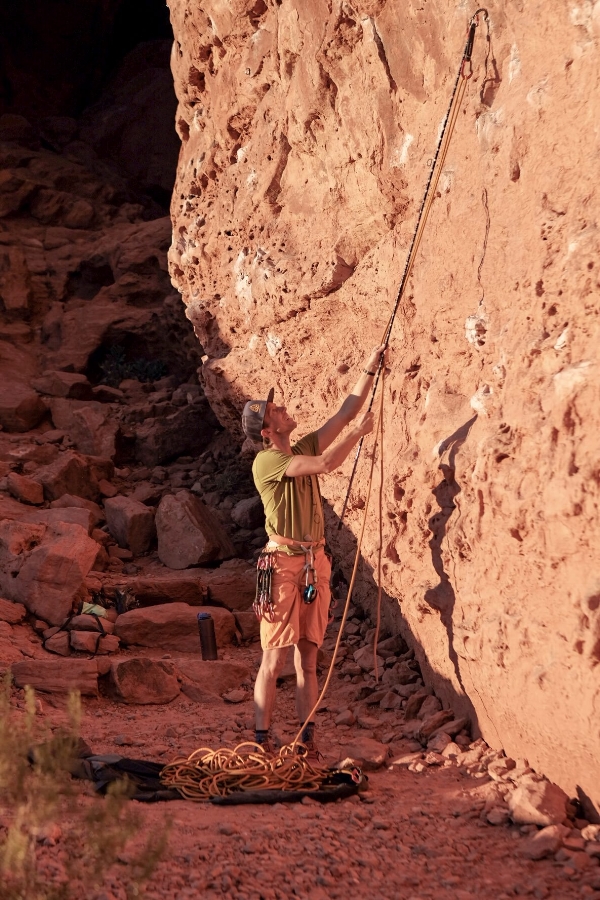
Aaron respecting the well-being of his ankles while climbing in St. George, Utah.
It's any pole or stick that allows you to preclip your rope (while leading) or a quickdraw to the next highest bolt hanger installed into the rock. Usually, this is done from the ground, in order to give the lead climber protection at the onset of the climb; in other words, to avoid hitting the ground. In sport climbing, I look at the pre-clipping the 1st or 2nd draw as a primary component of my risk management. I have seen too many preventable injuries and accidents: broken ankles, tailbones, and other injuries, which could have easily been prevented. Sport climbing is an activity in which the highest level performance is encouraged through minimizing risk. In my opinion, the bravery of boldness of "soloing" to the first bolt is unnecessary, and quite often, foolish.
In addition to mitigating the risk of hitting the ground, a stick clip can provide the following:
- retrieving (unclipping) quickdraws from above (given you have the correct attachment);
- while on route, clipping a draw above you to increase safety (by adding a secondary point of protection) while clipping in "direct" to haul something up;
- clipping up on project routes that are an ambitious undertaking;
- getting up a project to remove quickdraws; and,
- serving as a "snake stick" when approaching crags (seriously).
There shouldn't be any shame in using this tool, but be forewarned, it can become a crutch. It can become easy to rely on the stick when we should just be getting off the rope and learning how to climb and exist on "the sharp end."
How to make a packable and travel-ready stick
To make the version shown in the video, you'll need the following bits and pieces:
- Avalanche probe. This is what is used during an avalanche rescue or recovery to locate a buried victim. It is composed of aluminum or carbon shaft sections, and has an internal cord (usually steel) which, when pulled tight, snaps each section together. Upon first glance, it resembles a tent pole, however, the internal cable keeps tension to prevent it from popping apart. DO NOT USE A TENT POLE. Usually, the cheapest versions work fine, such as this 240 cm (8'2") and 320 cm (10'9") from Backcountry.com. I tend to prefer the longer sticks. Using the my assembly method will render the probe unusable as an avalanche debris search device (by gluing a clipping attachment to the tip), so just a heads-up on this.
- Superclip or Trango Squid clipping attachment. While I like the ease of the Squid, it doesn't offer the same durability as the Superclip, and it's a few bucks more. For travel, it's hard to beat the Superclip. If you really want to get crafty, you can glue an acme male thread on to the end, then you can use a Squid or Superclip. Awesome!
- Two-part epoxy rated for steel, such as J-B Weld 8276 KwikWeld. Your local hardware store probably has something for around $4. Just get this.
- Wood stirring stick...doesn't really matter too much. You just need to stir the epoxy to get it to "kick."
- Cardboard scrap to prop up the stick while it cures. Makes it even.
As for the construction, watch the video:
A stick clip is just as important as any other piece in your kit. Having a packable one like this means you can stick it in your pack and always have it ready. It's a great way to invest in your safety and your partner's.